Showing posts with label Scrapbook Pages. Show all posts

17 May 2016

'Love Her To Bits' - For Flutterby Designs

 Hi there lovelies!!
I'm back to share a layout I did a little while
ago using our NEW Flutter Colour paints.


 'Love Her To Bits'

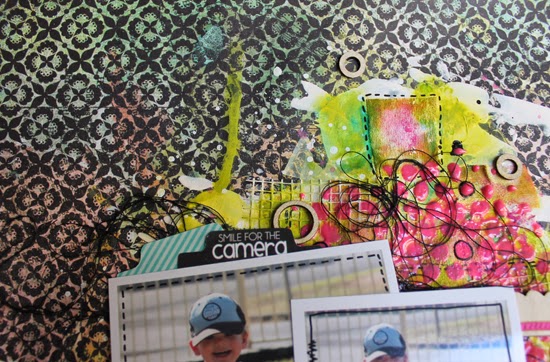
Close ups....


Flutterby Products used:


Sit back with your morning coffee & watch
my process video on how I created this :)


Head over to the Flutterby Designs FB page
to keep up with news, new releases & inspiration

14 May 2016

'Hello THere Sweetheart' By Anita Rodway for Colour Blast


It's my turn on the Colour Blast blog today & I've got a little layout to share with you :)
I've taken a few step-by-step pics to show
you my process.


I've grabbed some Bazzill 'Marshmellow' mixed media cardstock
(which doesn't require any gesso) & some Colour Blast Shimmer Sprays:
Royality & Lipstick. I've sprayed & dried it a few times, to build up the
colour & look of what I wanted.


I've then stuck down a strip of this pretty wrapping paper. I've then grabbed
a Flutterby Design 'I Heart You' stencil & 'Deep Water' Colour Blast paste.
While that was still a bit tacky, I've grabbed my 'Royality' Colour Blast Embossing
powder & just sprinkled over the paste. I kinda like how bubbly it went as I heated it.


I watered down some 'Deep Water' Colour Blast paste & added some drippage
thru the hearts. I decided it needed another 'pop' of colour, so of course I grabbed
some 'Bling' Colour Blast paste & Shimmer Spray. I've used a script stencil for
the paste & flicked on some splats with the shimmer spray.

Here's what my finshed layout turned out like :)

'HELLO THERE SWEETHEART'

Some close ups....


03 March 2016

'Gorgeous Girl' for Kraft + March Challenge

Colour Blast is one of the sponsors for this
month's challenge on the Kraft + blog.
Myself & Krisy were guest designers for
this challenge.
Here is my take on the sketch...

'Gorgeous Girl'

Close ups...

Colour Blast products I have use:
Colour Paste 'Lipstick'
Colour Embossing Powder 'Bling'
 Colour Shimmer Spray 'Bling'


If you'd like to participate in this month's Kraft +
challenge, head over to their bog HERE.
You could be in the running to win
some Colour Blast products of your own :)

12 January 2015

SBM Masters Entry 2014


So I wasn't successful this year again for Scrapbooking Masters :(
But that's ok - this year is going to be HUGE!!!!
Now the cat's outta the bag about who is, I can now share my entries...

SINGLE LAYOUT USING 5x7 PHOTO
‘Best Friends Are Like...’

This one actually got an honourable mention :)
AND there is SOOOOOO much Flutterby Designs goodness
thoughout the WHOLE magazine it is FANTASTIC to see!!!!

 
Large photos always challenge me!! With my scrappy style, I usually stick
to 6x4 or smaller. As I create a lot of my own unique backgrounds, I hate
having to cover up something great as soon as I’ve finished it. So I find
small photos still allow a lot of the background to be visiable. Making it
just as important as the photo. I made this photo prop for a recent scrap
retreat & the photos we took were priceless! I wanted to create a layout
bright & colourful - which represents exactly how we were feeling in this
photo. There’s just something about scrapbooking retreats, that’s just
simply just good for your soul. I’ve met so many wonderful people thru
them & to this day I get to call them friends. 
 

Close ups...

 Love this quote - it makes me giggle everytime I read it!!
 MATERIALS USED:
Paper; Crate Paper ‘Styleboard’, Heidi Swapp ‘Vintage Chic’, cardstock.
Embellishments; Gesso, Faber Castell Gelatos & Pitt Pens, Dylusions Ink,
Heidi Swapp Color Shine, Kaszazz stamp, Flutterby Designs flair buttons
& photo cuts, 2Crafty Chipboard, enamel dots, thread, India Ink, Tim Holtz
stapler, Stazon Ink & Dymo Labeller.


SINGLE LAYOUT USING UNCONVENTIONAL ELEMENT
‘Hello You’

I’ve had this paper in my stash for awhile & I really wanted to to give it a
purpose for something awesome. This one certainly challenged me.
I choose to use cut up baby wipes & use plasterers joint tape on my
layout as my ‘unconventional’ elements. The photos are of my 2yr old
running wild in our backyard & wanted to capture the movement in the
photos within my layout. By using different stroke directions, the texture
of the plasterer’s tape & baby wipes, the thread & the paint splats - I think
I capture just that.

 Close ups...


 MATERIALS USED:
Paper; Basic Grey ‘Out of Print’.
Embellishments; Gesso, Faber Castell Gelatos, Gel medium, Dylusions Ink,
Heidi Swapp Color Shine, Prima stitch stamps, Flutterby Designs -
Wood Bits, Flair Buttons & Photo Tabs, Baby Wipes, Plasterer’s Joint Tape,
Posca Paint pens, Watercolours, American Craft - Thickers, thread,
Stazon Ink & Tim Holtz Stencil.


SINGLE LAYOUT USING JOURNALLING AS FOCUS
‘To Live A Creative Life...’

I am seriously in love with brush script at the moment!! This quote is
very relatable & true to me. We over think everything these days, so who
says experimenting creatively with our art has to be perfect or right - but
exactly how we see it. With a competition like this, we are critiquing our
entry before we’ve even finished it, with the fear of what others will think.

I’ve used my favourite things at the moment on this layout:
Gelatos, Dylusions & Color Shine. I love how vibrant they all work together.
While the journalling is the main focus, the veneer frame highlights the
photo & draws you’re eye back over to it. I find that creating my own
unique backgrounds, is fulfilling & I can really make it ‘my own’.

Close Ups...
 MATERIALS USED:
Paper; 7 Dots Studio ‘Dreamer’.
Embellishments; Gesso, Faber Castell Gelatos & Big Brush Markers,
Dylusions Ink, Heidi Swapp Color Shine, Denim Tampons stamps, Kaszazz
stamp, Flutterby Designs - Wood Bits, sewing machine, India Ink, paper
scraps, enamel dots, thread, hole reinforcer stickers, washi tape & Stazon Ink.


ART JOURNAL COVER
‘Create Today’ 


This task is what convienced me to have another crack at Masters this year.
I love art journalling - I find it relaxes me when I can’t find the time to scrap.
I decided to make my own journal from stuff I had lying around my craft room.
I LOVE how it turned out!! It completely suits my style - random & full of character.
The cover had to be teal (it’s my fav) & I wanted to keep the cover arty, but not
over embellished. Bulky items on an art journal cover are not practical when
using it.

I’ve used a Flutterby Designs ‘create’ Flair Button, which has a mixed media feel
to it & Wood Bits ‘ Today’ & Confetti Circles. These embellishments are still quite
flat & aren’t an issue when creating. I’ve also done a few pages in it too...

Close ups...


 MATERIALS USED FOR ART JOURNAL:
Paper; Teresa Collins ‘Memorabilia’, Kaisercraft ‘Base Coat’, Crate Paper ‘Styleboard’,
Amy Tangerine ‘Plus One’, Echo Park ‘Times & Seasons’, watercolour paper, vintage
music sheet, velum, paper bag, calico, Project Life lined & grid 6x4 cards, American
Crafts Cardstock.
Embellishments; Black duct tape, sewing machine.

Cover; Vintage lace, Gesso, Liquidtex paint, Dylusions Ink, Faber Castell Gelatos,
Gel Medium, Tim Holtz Stencil, Flutterby Designs Wood Bits & Flair Button,
enamel dots, thread, Kaisercraft small alphas & Glossy Accents.

04 January 2015

How I stay up to date with my monthly Project Life


WARNING: Long Post LOL!!!
 Ok so I've wanted to do this blog post for a while now & thought it best to do
it now, as a lot of us are starting our 2015 Project Life albums.

This is my first year of doing PL. When the PL hype it our shores,
I was completely drawn into the frenzy & brought it all LOL. It then sat on my shelves
for months!! It was really really daunting & I had no idea where to even start!?
 I had made a few mini albums of my son's baby pics, but the bulk of his photos
where just chucked into those boring 6x4 photo albums
(pretty sad effort for a scrapbooker I thought).
So I decided to undertake over-hauling that & rather than re-printing photos,
I chopped & cropped & used as many as I could. Some I did have to reprint, but
I managed to repurpose most of them.

I had brought myself a core kit, big variety box of sleeves & an album (or 3).
I began putting all my photos into the sleeves in order & left gaps for cards.
That was a LONG process, but it meant I got all my photos in the right spots.

Then came the embellishing part - I really struggled with this!!
It took a while to find MY STYLE. We all have our own style & take on craft/art,
it's what's so special & makes us different. Once I found 'my happy place' with embellishing,
it all started to work together & come naturally.


Ok so I told you - LONG POST ha ha.
As a busy full-time working mum who also runs her own business from home,
I was always daunted by the task of doing Project Life weekly. There is just NO
physical way I could committ to that sort of undertaking. It wouldn't get done.
So I decided to do to it MONTHLY.
This I could committ to! I'm not a traditional Project Lifer - I like it different, busy & bulky!
I started off by getting a 12 x12 'work in progess' album from the lovely
 This made carrying my unfinished projects to crops & such MUCH easier!
(& I didn't damage my proper album, by lugging it around everywhere)
I then chucked in a mixed variety of sleeves:
- Becky Higgins Project Life
- Ones fron Harvey Norman
- WRMK
 - & some 12 x 12 sleeves.
I didn't like the quality of the American Crafts or Kaisercraft sleeves - but that's
just my personal preference.

I then grabbed some note paper & labeled each page with a month
& drew a rough sketch of the page protector (front & back).
This made it really easy to make notes & plan what photos I wanted to put in
there, without printing 100's of photos! I could also jot down on this if I knew
I wasn't going to get a chance to tackle a spread for this month.
Like below:


 Then as I do - I start with the photos in first. I then fill in the blanks with
LOTS of different card designs.
Some of my favourite cards to use are:
- Flutterby Designs 'Everyday Etc' cards (I am a bit bias LOL)
- Sn@p cards
- Project Life cards
- Handmade ones


 Then comes the decorating!!! Sometimes this may not happen
straight away - the spread may just sit with pics/cards & little bits of paper
with notes until I get a chance to get creative.

These are what I generally ALWAYS go for when embellishing my pages:

 WOOD VENEERS

 - Flutterby Designs
- Studio Calico
- or even 2Crafty Chipboard

 FLAIR BUTTONS 
 As the owner/designer of Flutterby Designs - I always have a
gazillion flair buttons on hand to use :)

BLACK COTTON 

I love to put a messy nest of this under my flair buttons for more texture.


POSCA PAINT PENS 

These little babies write on just about EVERYTHING!!!
Great for doodling/journalling on photos.

PAGE TABS
 
 These are from Flutterby Designs, & they are an inexpensive embellishment that
adds detail - without the bulk. Fussy cutting relaxes me, so I will often sitting in front of
the TV with a pair of scissors & cut a heap of these out to use down the track.

 LIQUID PAPER TAPE

 
 I 'borrowed' this idea from my good friend Lauren ;)
Just put down a few stips & journal away - easy peasy!!

HOLE REINFORCERS

These little babies are cheap as chips! You can find them in the cheap
shops & they make for super quick detail with a little bit of doodling around them.
As too are shipping tags great for adding layers without the bulk.


SMALL ALPHABET STICKERS

 I definately have a 'thing' for these little babies!!!
I have an abundance of them - in every shape, font & colour LOL
Brands I love to use are:
- Simple Stories 'Sn@p'
- Jellibean Soup
- Kasiercraft
- Tim Holtz
- even ones you find at cheap shops!

THICKERS

 I love thickers just about as much as the small alpha stickers...
Great for titles!

 ENAMEL DOTS

 I LOVE LOVE LOVE these little babies!!!
I put them on EVERYTHING ha ha.

 This is what's on my desk at the moment. Trying to get the last couple of months
finished in this years PL album. I'm on the home stretch WOO HOO!!!


Here are a few completed pages from earlier this year :)


 Yes as a traditional 12 x12 scrapper I put in a few layouts throughout
my album to find my 'happy place' & balance with doing this style of scrapbooking.


I hope I have helped anyone out there struggling with finding their 'mojo'
with Project Life. Thanks for taking the time to read my long-ass post - 
hope you enjoyed some of my tips & tricks.