Showing posts with label Photos. Show all posts

15 June 2016

June Shares for Flutterby Designs

I thought it was time
I popped in & shared a few projects I've created
over the last several weeks. I've just started retreating again... & I LOVE being able to let my hair down & create with my people. Nothing better than having sore ab
muscles from being bent over laughing for so long.

'Hello Beautiful'

I've used the new 'Partners In Crime' collection.
I loved this sheet of Cocoa Vanilla Studio paper &
it looked like the perfect starting point. I've gone in
with some gesso & my Flutter Colour paints swooshes.
I then began piecing & layering the Everyday Etc cards
with my photo. 

Finishing up with some doodling, Circle & Confetti Circles wood veneers, Flair button, Teal Sticky Snippets, Enamel dots & Partners In Crime Page Tabs. I've also used
a Charm's Creation Mini Heart.


PRODUCTS USED:


 'Mum Mum Mum'

This cool monochrome layout I created at a my first
retreat away from Evie (who turned 1 the day before LOL). I've started with a mixed media base.
I've used the 'I {heart} You' stencil with some glass
bead gel, plus some Flutter Colour paint, gesso & a bit
of Colour Blast paste. With a simple bit of layering, flair button, Page Tabs, doodling & title - it's done!


PRODUCTS USED:


30 December 2012

 Riley's Smash Cake Mini Album 

Here's another mini (I know - don't groan)! This one has the stitched binding again. I love this mini! It is so bright & quirky. I did a 'Smash Cake' photo session with Riley for his first birthday. Smash cakes are becoming more popular & more expensive. I've heard of people paying $80 for a cake & then hire a professional photographer as well!? Holy doly - not me, I brought a lie from Etsy, the same material from spotlight & made a nappy cover, 2M of white block-out curtain material also from Spotlight for the backdrop, a piece of white corflute as floor mat & got everything ready & snapped away with my Canon DSLR. Handy hint though - it pays to have a few people their to help. Riley saw me perched on the ground at his level & all he wanted then was a cuddle, so we had to keep putting him back in frame. Also you don't want to get cake all over your camera (especially when your sister can get it all over her LOL! Thanks Beth). 
 
 
Here's the link to my YouTube vid for this one:
 
 
Thanks for stopping by :)
 

20 May 2012


My Chaotic Mess!!!

Here is a few snapshots of my very untidy scrap room. There's no mojo lurking in this chaos!!


I got some peg board from Bunnings & made 2 panels to go on the fronts of my cupboard doors. It's great, now I can see what I have in my stash & use it. It's like having my own little shop LOL!! Bad side: My hubby can also see what I have stashed he he....


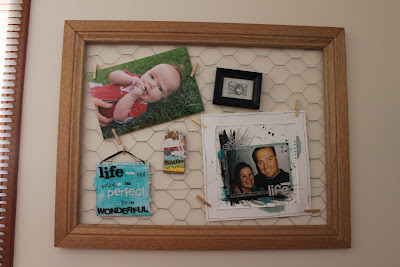
 I brought an old frame from a garage sale, put some chook wire behind it & decided to use it as my inspiration board :)


05 March 2012

My cheeky little monkey...


This is my cheeky little monkey... I can't believe he is 3 months old this week. It has gone soooo quick.

Scrapbooking Memories - Masters 2011 Entry


These were my entries for 'Scrapbooking Memories - Masters 2011'. Although I didn't get selected, I still wanted to share what I did...

With this page you had to use a 5x7 photo.


This page you had to have hidden journalling.


This one was based on a sketch provided. This one did get published!!! I got an
Honourable Mention... Yay was so excited!!!!


This was a double page to have the colour scheme orange, blue & brown.


03 January 2012

My Pride & Joy....

Just wanted to share the biggest project I have EVER made...

Welcome to the world my little man. This is Riley Joseph, & he is by far the best thing I've ever created!!! I am still amazed how you possibly fitted into my belly all this time. This photo was taken when he was 1 day old. Love you lots, Mummy xox


08 January 2011

My Scraproom

Hey Scrappers,

I've taken a few photos of my scraproom. It's the cleanest it's ever been, thanks to my Sister for her help & being pushy enough to make me finish cleaning it :)

These shelves I made these myself! They cost about $30 to make & there was enough room to store all my bits & pieces. The containers that I have all my flowers in cost $1. The top row sits on top of the shelf & the bottom row are held up by magnets. I used a strip of metal & glued magnet to the bottoms of the containers.
Neet xox